Step 1: Increase the Hard-disk in ESXi
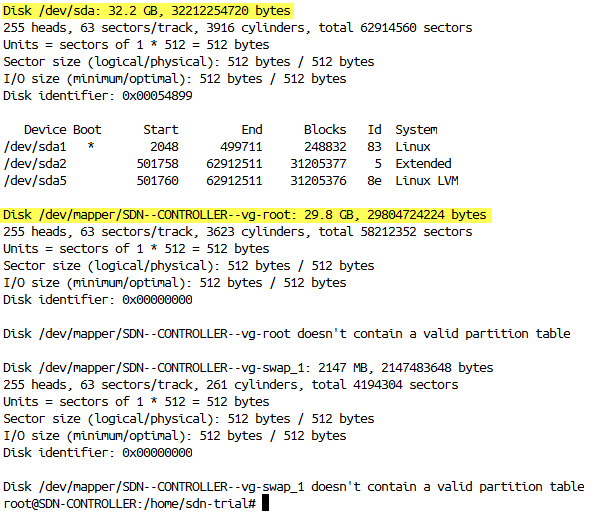
Before Hard-disk Upgrade:

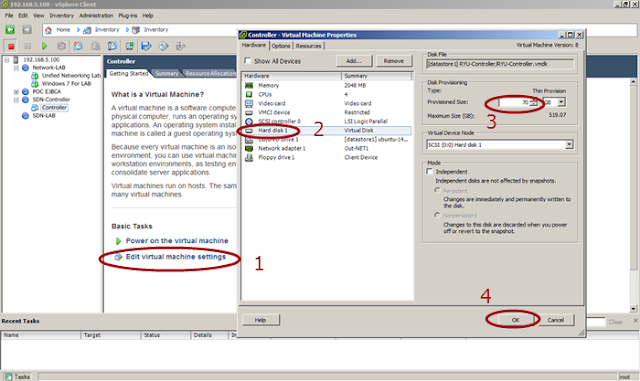
Increase size in disk Provisioning, you my use:
- Right click on your VM
- Choice Edit Settings
- Choice Harddisk
- Change capacity in Provisioned Size (in case I change to 70 GB)
- Click OK
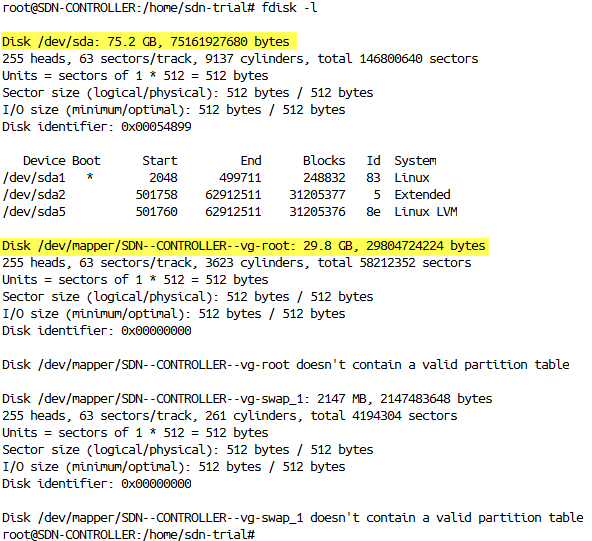
Is it done? Not yet, when you increase the size, the system detect in the new dev file. So It should assign first then system can use it.
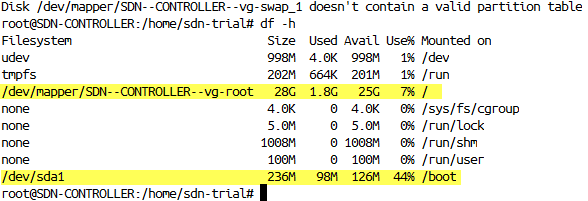
Then when you check report file system disk space usage, vg-root just use 28G
Step 2: Detect the New Space
Do this command:
$echo "- - -" > /sys/class/scsi_host/host0/scan Do command
fdisk /dev/sda
Command (m for help):
 Command (m for help): n #New Partition
 Partition type:
   p  primary (2 primary, 0 extended, 2 free)
   e  extended
 Select (default p): p #Primary
 Partition number (1-4, default 3): 3 #Use Default
 First sector (499712-146800639, default 499712): #Hit Enter
 Using default value 499712
 Last sector, +sectors or +size{K,M,G} (499712-501757, default 501757): #Hit Enter
 Using default value 501757


 Command (m for help): t #change a partition's system id
 Partition number (1-4): 3  #Partition number must be same that created before
 Hex code (type L to list codes): 8e  #Hex number for LVM
 Changed system type of partition 3 to 8e (Linux LVM)

 Command (m for help): w #write table to disk and exit
 The partition table has been altered!
 Calling ioctl() to re-read partition table.

 WARNING: Re-reading the partition table failed with error 16: Device or resource busy.
 The kernel still uses the old table. The new table will be used at
 the next reboot or after you run partprobe(8) or kpartx(8)
 Syncing disks.
root@SDN-CONTROLLER:/home/sdn-trial# root@SDN-CONTROLLER:/home/sdn-trial# reboot
Broadcast message from sdn-trial@SDN-CONTROLLER
(/dev/pts/0) at 7:23 ...
The system is going down for reboot NOW!
root@SDN-CONTROLLER:/home/sdn-trial#
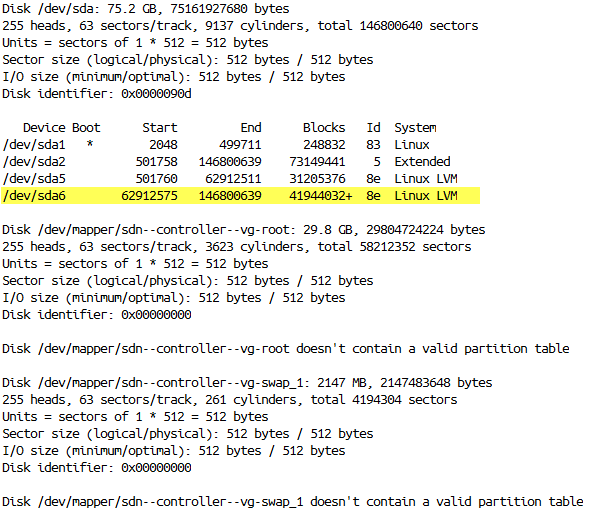
But it is not finish yet, we have to extend the logical volume. So logical volume can be increased
Step 4: Increasing the Logical Volume
Create physical volume
pvcreate /dev/sda6
 vgdisplay
 pvscan
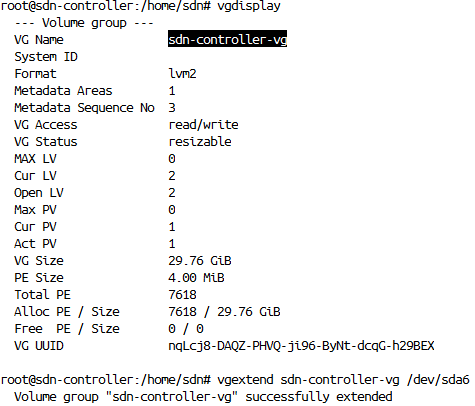
When want to extend the vg we can do command vgextend [vg name] [device sda] m in my case my vg name is sdn-controller-vg then the device id is dev/sda6, so I do command:
vgextend sdn-controller-vg /dev/sda6

It is not complete yet, we have to increase the logical volume. with extending use /dev/sda6. Before extending the Logical Volume (LV), I should know the LV path, to verify lvpath just do command lvdisplay. Then the output is:
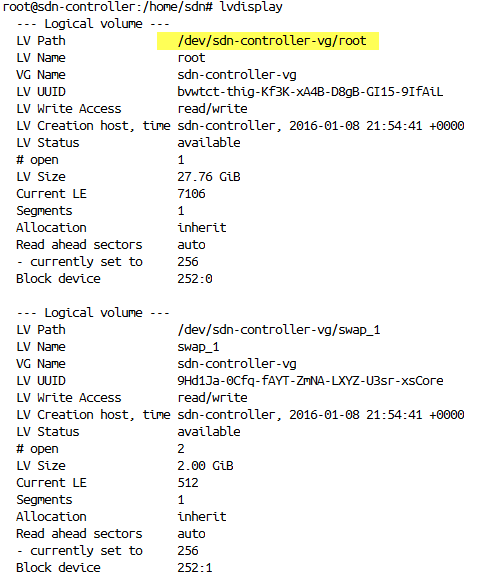
To extend logical volume, just do the command lvextend [lv path] [dev sda id that use].Because my lv path is /dev/sdn-controller-vg/root and dev sda that I use is /dev/sda6, so I do command:
lvextend /dev/sdn-controller-vg/root /dev/sda6

Finalize with the re-size the file system, so it can advantage of additional space, for re-size. Just do the command resize2fs [lv path]. in My ubuntu I do command:
resize2fs /dev/sdn-controller-vg/root
After this you can verify from pvscan, lvdisplay, df-h, and fdisk -l

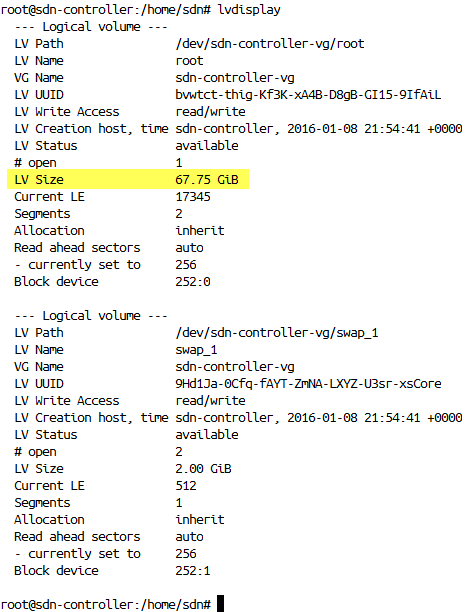
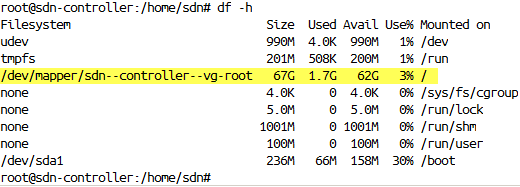
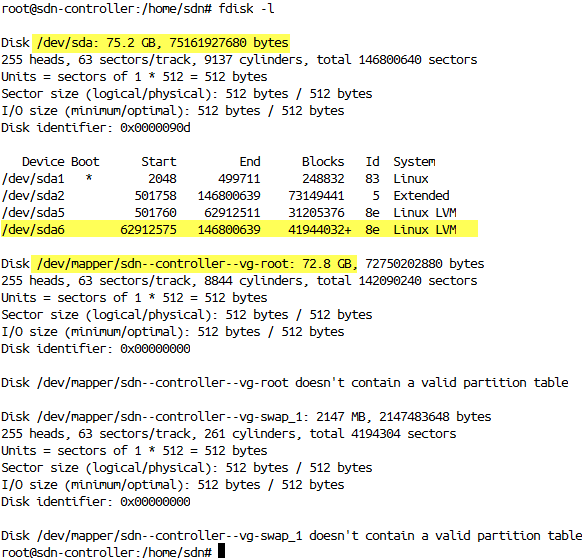
I think is done. Thanks for reading. And I hope It can help you :)

2 Comments
increasing the capacity of the hard disk is fine and i adapt the above technique
ReplyDelete1tb external hard disk
This sort of thing needs to happen! Get motivated and get pissed off. Now this will let you take the next steps to becoming successful. toshiba external hard disk
ReplyDeletePost a Comment